Inventor
Inventor is a program made by AutoDesk. The program allows the user to create 2D and 3D sketches that can be downloaded into a file. It can be transferred to MakerBot, which is the 3D Printing Software that we use in IDEA. Below are the final products of 5 of the 6 widgets I made in Inventor, while there will be one widget that I will show step by step creation of.
|
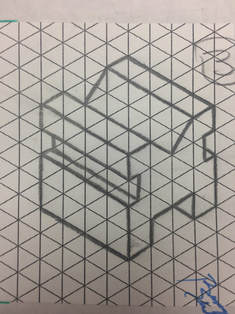
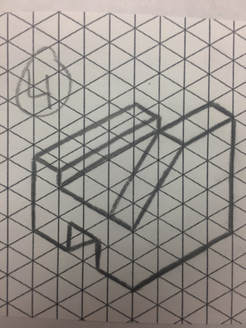
The Sketches
|
|
The Widgets
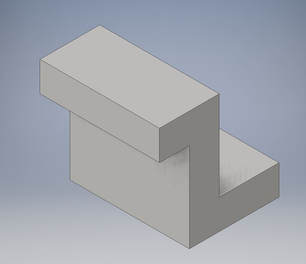
This is widget #1. This was the easiest of the widgets to make. First I made the 3D cube and edited the side so that two rectangle would extrude into the cube, making correct measurements and angles. It didn't take long to finish this first one
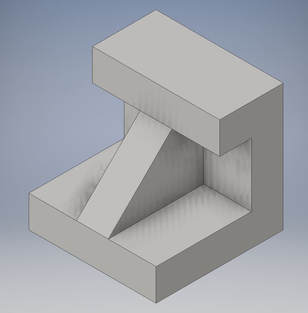
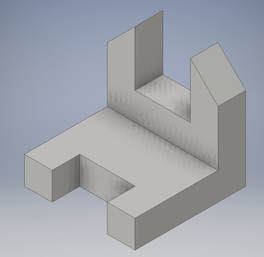
Here is widget #2. This one was much more difficult to make. First, I had to hollow out the middle and edit out 1/2 the length of the top section. Next, I had to draw in the triangle and adjust the measurements to make sure it was correct. Finally I extruded it from the middle so that the triangle is in the exact middle.
Here we have widget #4. I would say that this widget gave me the most trouble. I had to make different angles and measurements in relation to side lengths. I used many X/8 inputs and had to make sure there was a break in the incline on the right side of the widget. After the top was done, the bottom was easy, but I'd still call this one the most difficult to make in my opinion.
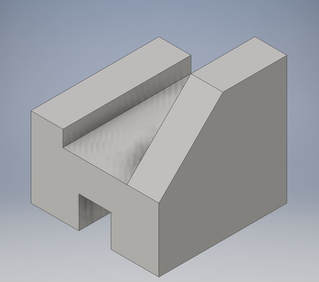
Widget #5 is next. This widget was pretty straightforward and the only difficult thing to deal with was the two sharpened edges. Once I edited the angles to 45 degrees each I extruded them so that they were cut out and the rest was simple.
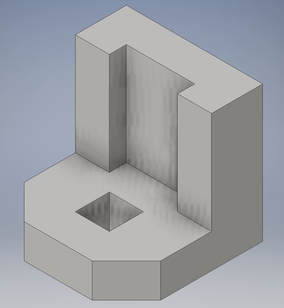
Lastly was widget #6. This was sort of a middle ground for me. It did take longer than the others but the steps were pretty easy. I had to make sure the measurements were correct though, because the first time I did this one, one of the measurements were off and I had to correct it. Overall this was a fun experience and somewhat of a challenge.
Widget #3 Step by Step Creation
|
|
Slide 1: For this step, all I had to do was create the square and edit the dimensions so that it was a 1x1 square.
Slide 2: For slide 2, you can see that I am starting to measure out the different dips and overhangs in the widget. For all of the sides and cut ins of the widget, I have had to edit all of the dimensions to make sure that they are equal to the widget sketch. Slide 3: As for slide 3, I have finished all of the sides that needed to be proportioned correctly and I have also made sure to snip the outside border lines that were present in slide 2. Slide 4: In slide 4, I put the finishing touches on my widget and started to extrude it. What you are seeing is the 2D version being extended backwards to be made into a 3D object. Slide 5: This is the final product of what I have been doing in Inventor. I then saved this file and moved on to the MakerBot Software. Slide 6: Once I added the file to STL and uploaded it to MakerBot, this is what the shape mapped out on the board that the 3D Printer uses to determine how big to make the object. Slide 7: This is the Printing Preview of the widget that I made. I can adjust the slider on the side to see the layer amount change. As you can see, there is a small table looking shape under my widget. That is the divider that can be peeled off of the final product, leaving you left with just the widget. Slide 8: This is the small table divider that is made under the actual widget. It ensures that the widget will not stick to the table or be damaged in any way otherwise. Slide 9: This is my final product. My widget. |
Summary
In conclusion of this amazing experience, I want to share what I have learned and what I had to overcome. At first, I didn't really understand how to use Inventor properly, but I kept on trying. Eventually I got the hang of it and it was a breeze. A fun breeze. After making all of my widgets, I was set on the 3rd one. Don't ask me why, as I don't know why. Still though, I did everything that I needed to and I asked questions along the way. At one point I realized that I didn't screenshot many things, so I went back and redid them from scratch, which is why I some of my screenshots have different looks. Even though I didn't do it right the first time, I corrected my mistakes and in the end I had something that I could be proud of. True, my 3D Printing machine wasn't working properly at first, but I was fine with asking for Mrs. Proctors help. I also had to come in for lunch to get my final widget photo, which was alright for me. This was truly an awesome experience and has brought me even closer to the technology that I love so much.
