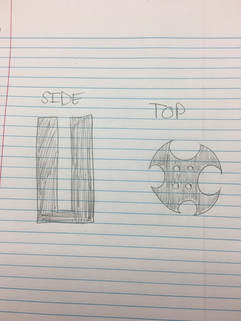
Sketches.
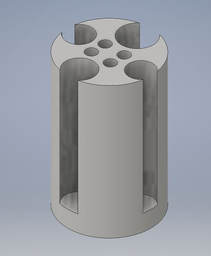
< 3D Visual Sketch
< Research
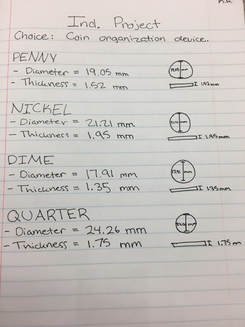
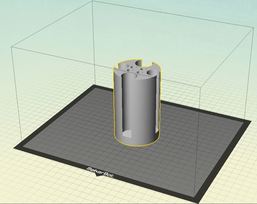
Coin + Pencil Holder.
|
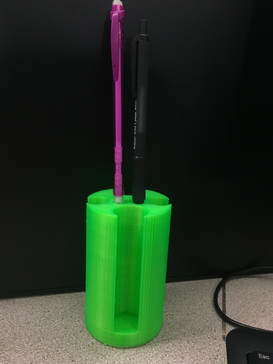
Way back when we were first introduced to this project, it was just to give us an idea of what we wanted to do. I chose to do the coin holder. Once I had chose what I wanted, I needed to find out the width of every coin so that I could use Inventor to make the holes in my design the correct dimension, which in turn would make them fit. Once I had completed the design in Inventor, I showed it to Mrs. Proctor. According to her, my design had been done many times. Because of this, I decided to add four holes at the top so that it would not only be able to hold coins, but it would also be able to hold four pencils. Multi-purpose. I then exported the file to Makerbot, where I made the dimensions reflect the measurements of Inventor. Once I had oriented it correctly and checked the print preview, I put it on the USB drive and started printing. (Side Note: My first print stopped working for some reason and it wasn't my fault. Thank you Mr. Willauer.) Once the print was finished, I ended up with a neon piece of greatness. Here you can see that it's doing 1/2 of its job. Don't bully me that I'm too poor to afford coins to go where they go. Just imagine them there.
|

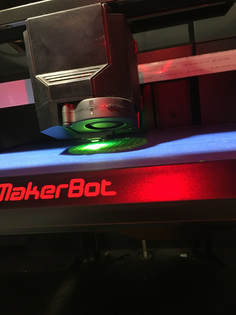
Using the 3D Printer.
I think you get the drill by now. ooooooooooooooooooooooooooooooooooooooooooooooooooooooooo
Summary.
This was my final rotation, and I would also like to say it was the coolest and most agitating rotation I've done. When I printed my design first, it started to air print, which means that it got cut off in the middle. The second print got about 90% of the way there when the extruder head fell off and crushed and melted my print. It finally worked on the 3rd try, and I have to say that my final product was one of the best ones that I have had so far. It has an awesome neon color and it also meets two project criteria, since one of the other options was a pencil holder. God, I'm creative.
